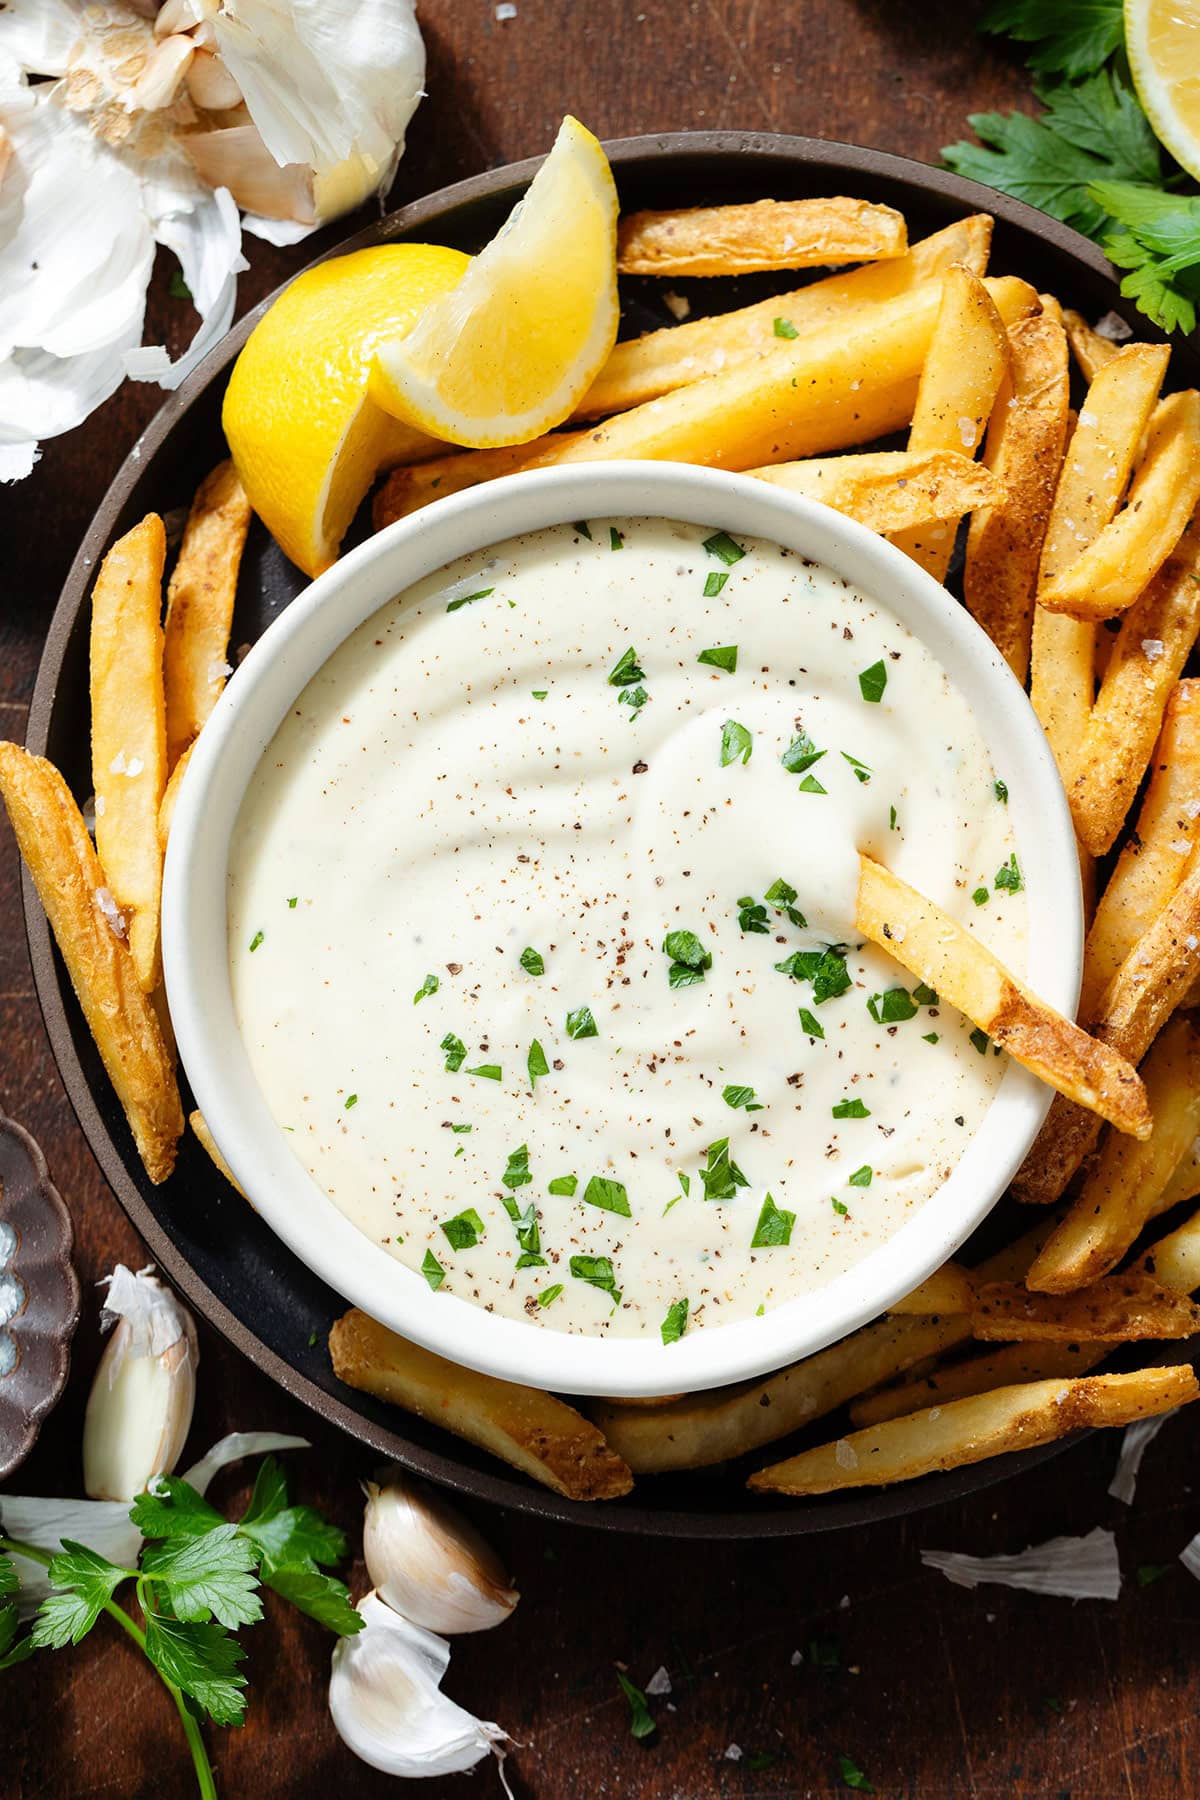
This Roasted Garlic Aioli is made with a whole bulb of roasted garlic that gives the dip the most amazing buttery garlic flavor ever! It's super easy to make (no need for raw egg yolks!), extra creamy, and so delicious with french fries. If you're a fan of garlic aioli, definitely try it with roasted garlic!
Jump to:
What is roasted garlic?
Roasting garlic is incredibly easy and it completely transforms the flavors of the garlic! It has a much more mellow, caramelized garlic flavor and you can use larger quantities in your recipes than you normally would with raw garlic. Any recipes with multiple servings often use the whole bulb!
It can be used in a ton of different recipes from appetizers and dips to soups, dressings, and sides. I always make a bigger batch and keep it in the fridge or freezer for other recipes. My favorite way to use it is this Roasted Garlic Hummus but these Roasted Garlic Mashed Potatoes and this Roasted Tomato and Garlic Soup are also amazing!
Why You'll Love This Roasted Garlic Aioli
Amazing buttery garlic flavor - This roasted garlic aioli is extra garlicky without any of the pungent raw garlic taste! When you roast garlic, the heat transforms the alliin in raw garlic and completely changes the flavor. It turns soft and buttery, and you can use much more of it than you would with raw garlic.
Quick and easy version - I'll admit, this garlic aioli isn't made 100% from scratch because it's made with mayonnaise. True aioli is made with egg yolks, olive oil, lemon juice, garlic, sea salt, pepper, and often mustard. I wanted to keep things very simple and easy, so I used quality mayo instead. This aioli comes together super quick (after you roast the garlic), and it's totally fool-proof.
Creamy and light - I use an immersion blender to blend the aioli and the roasted garlic blends to a completely smooth texture along with the rest of the ingredients and the result is the most creamy and velvety garlic dip!
Lots of uses - Garlic aioli is most often served with french fries or any kind of potatoes but there are many other ways you can serve it! You can add it to burgers, sandwiches, and wraps, or you can even drizzle it on rice bowls instead of a sauce like Spicy Sriracha Mayo.
Ingredients
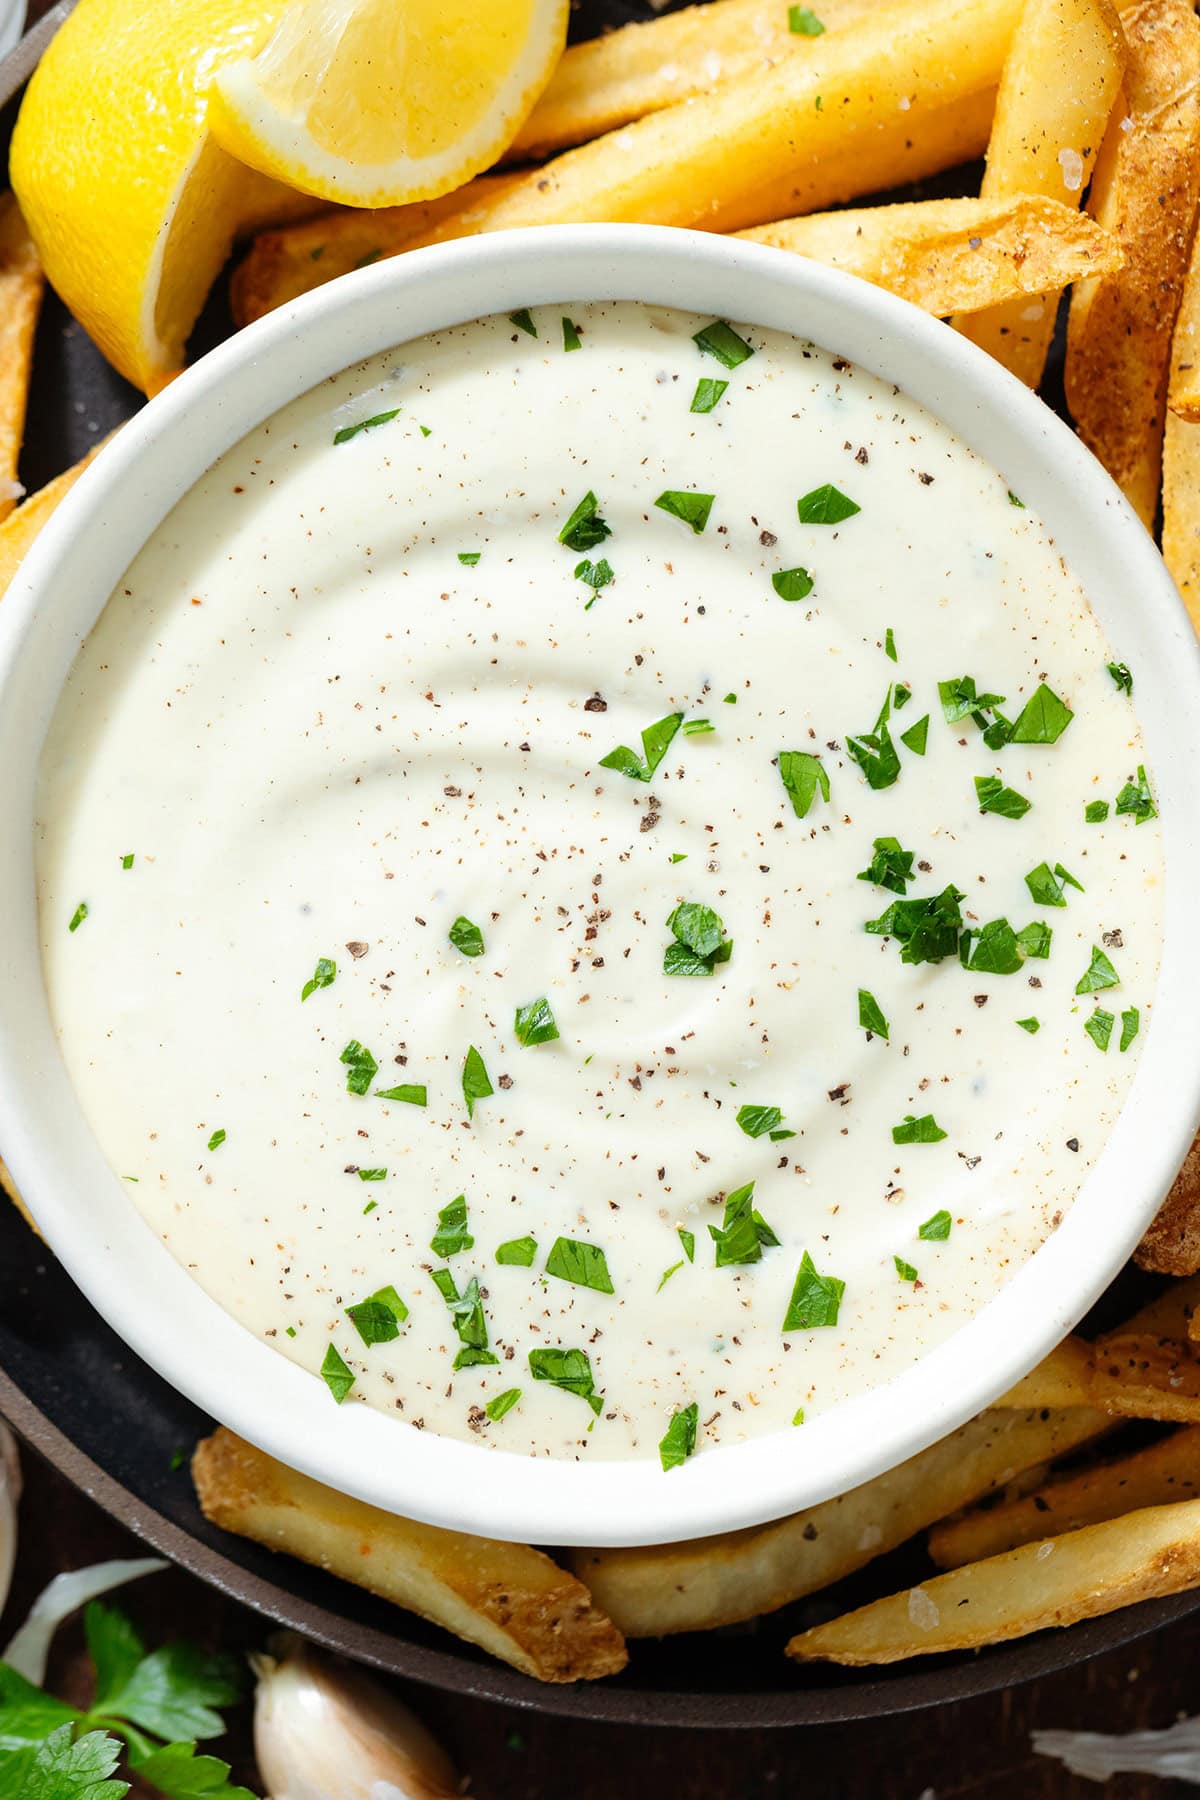
- Mayonnaise - I prefer using 100% avocado oil mayonnaise as a healthier alternative to classic mayo made with canola or other seed oils. There are ones made with coconut oil as well. You can use vegan mayo if needed.
- Roasted garlic - You need one bulb of garlic and a tablespoon of olive oil. You can also use other cooking oil if you prefer but I like the flavor olive oil gives the garlic. See How to Roast Garlic in the Oven for more detailed instructions.
- Lemon juice - Use freshly squeezed lemon juice whenever possible. You don't need much of it just a little squeeze for freshness and to balance the heavy mayo.
- Worcestershire sauce - You can't taste this much in the finished aioli but it adds that little something and ties all the flavors together.
- Sea salt and black pepper - Use sea salt or Himalayan pink salt whenever possible. All my recipes are made with freshly ground black pepper for the best flavor. If you're using pre-ground pepper, use less of it because it's much finer.
Variations and Substitutions
- Raw garlic - If you don't have the time to make roasted garlic, you can also make this with grated raw garlic instead, as you would regular garic aioli. Keep in mind you only need 1 clove of garlic if you're using it raw. It's much stronger in flavor than roasted garlic.
- From scratch - You can make the aioli from scratch by skipping store-bought mayo and making your own with egg yolks, olive oil, and other ingredients. Making homemade mayonnaise is easier than you might think, but I usually just go with store-bought mayo to save time and dishes.
Would you like to save this recipe?
Step-by-Step Instructions
- Preheat your oven to 400F (200C).
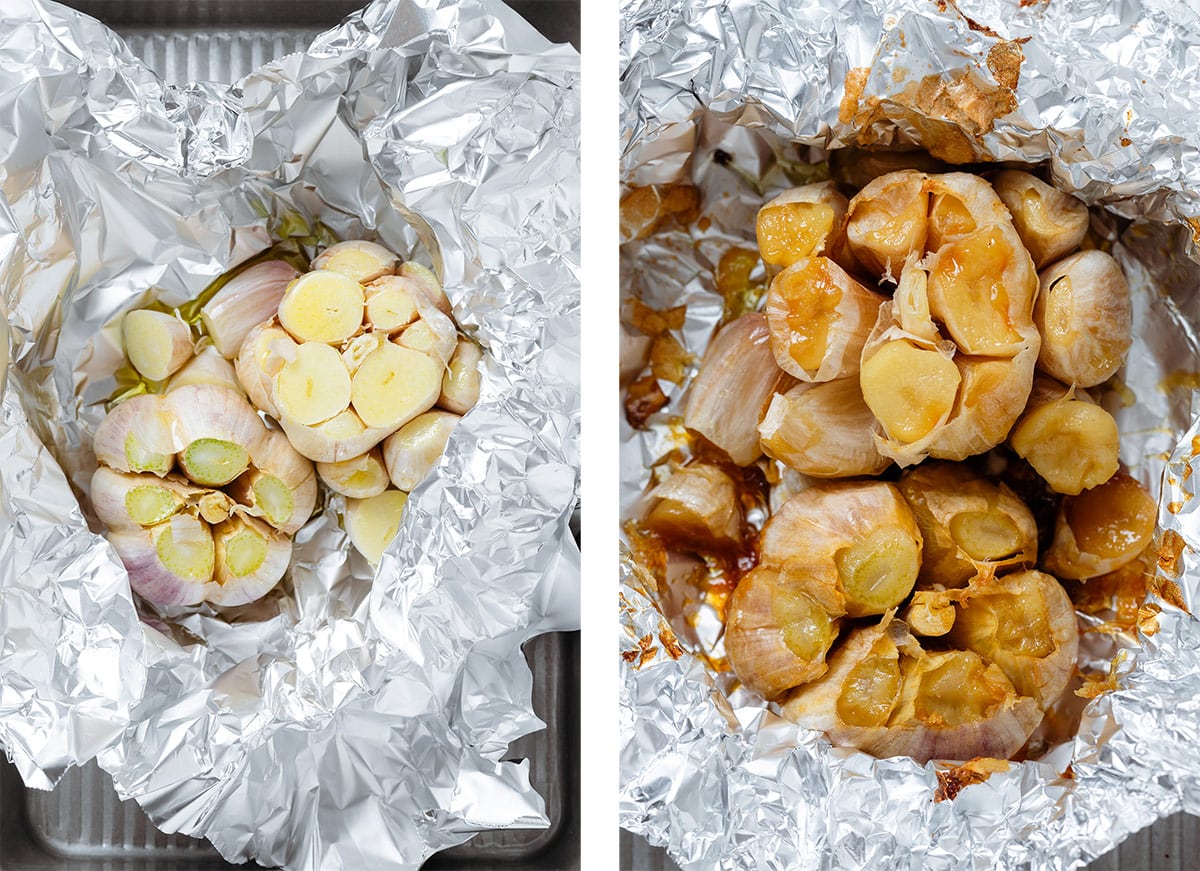
- Cut off the top of the garlic to reveal the cloves, being careful not to break the bulb apart.
- Wrap the garlic in foil and add to a small baking dish.
- Drizzle the visible garlic cloves with olive oil and close up the foil.
- Roast in the oven for 40-50 minutes.
- Take the garlic out of the oven, open the foil very carefully to avoid getting burned by the hot steam, and let the garlic cool for 10-15 minutes while you prep the rest.
- Keep in the fridge if you plan to store it for longer. The garlic should ideally be completely cool when you mix it with the rest of the ingredients.
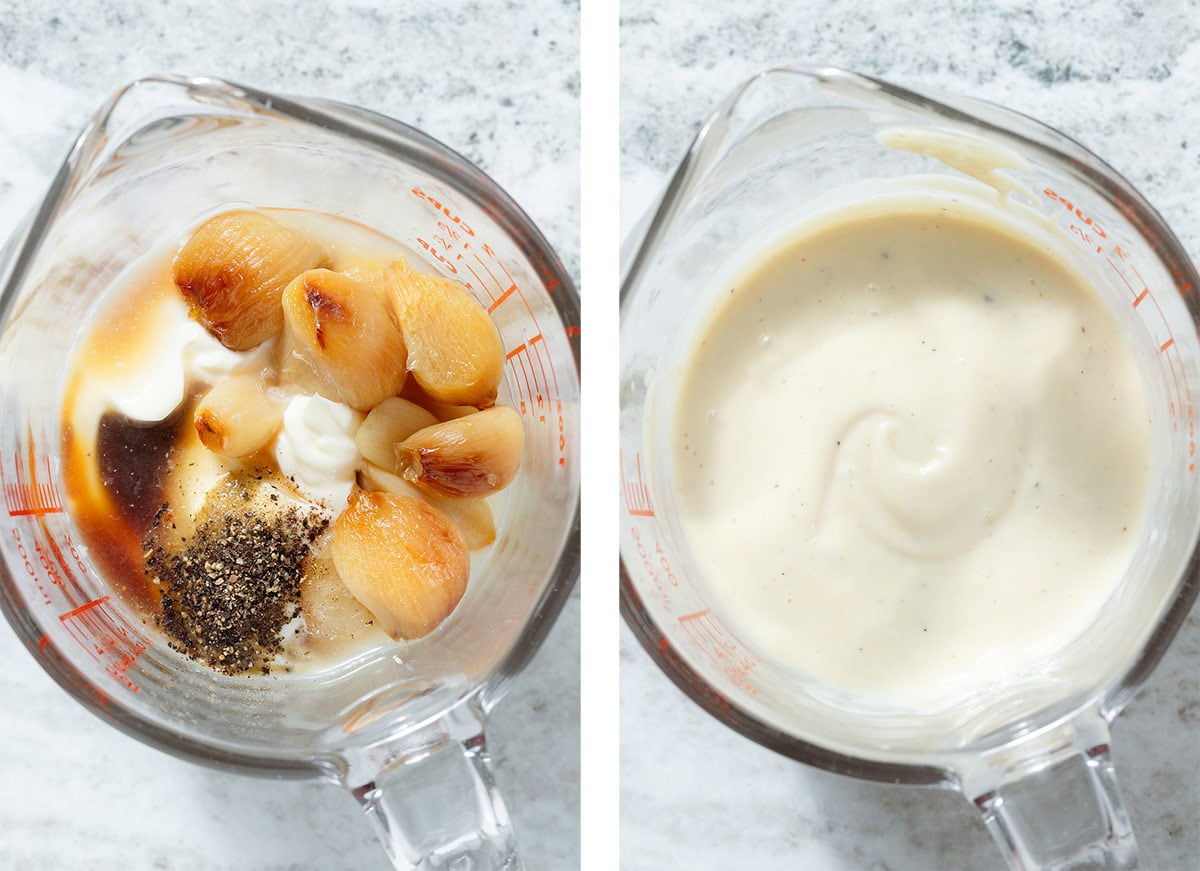
- Add mayonnaise, lemon juice, Worcestershire sauce, sea salt, and black pepper to jar with a large opening.
- Use a spoon or a fork to get all the cloves out of the garlic bulb and add them to the rest of the ingredients.
- Use an immersion blender to blend everything together until smooth. You can also do this in a food processor or a blender.
- Add more sea salt, pepper, or Worcestershire sauce if needed.
- Enjoy immediately or store in the fridge for up to a week. The aioli is best served chilled.
Serving Suggestions
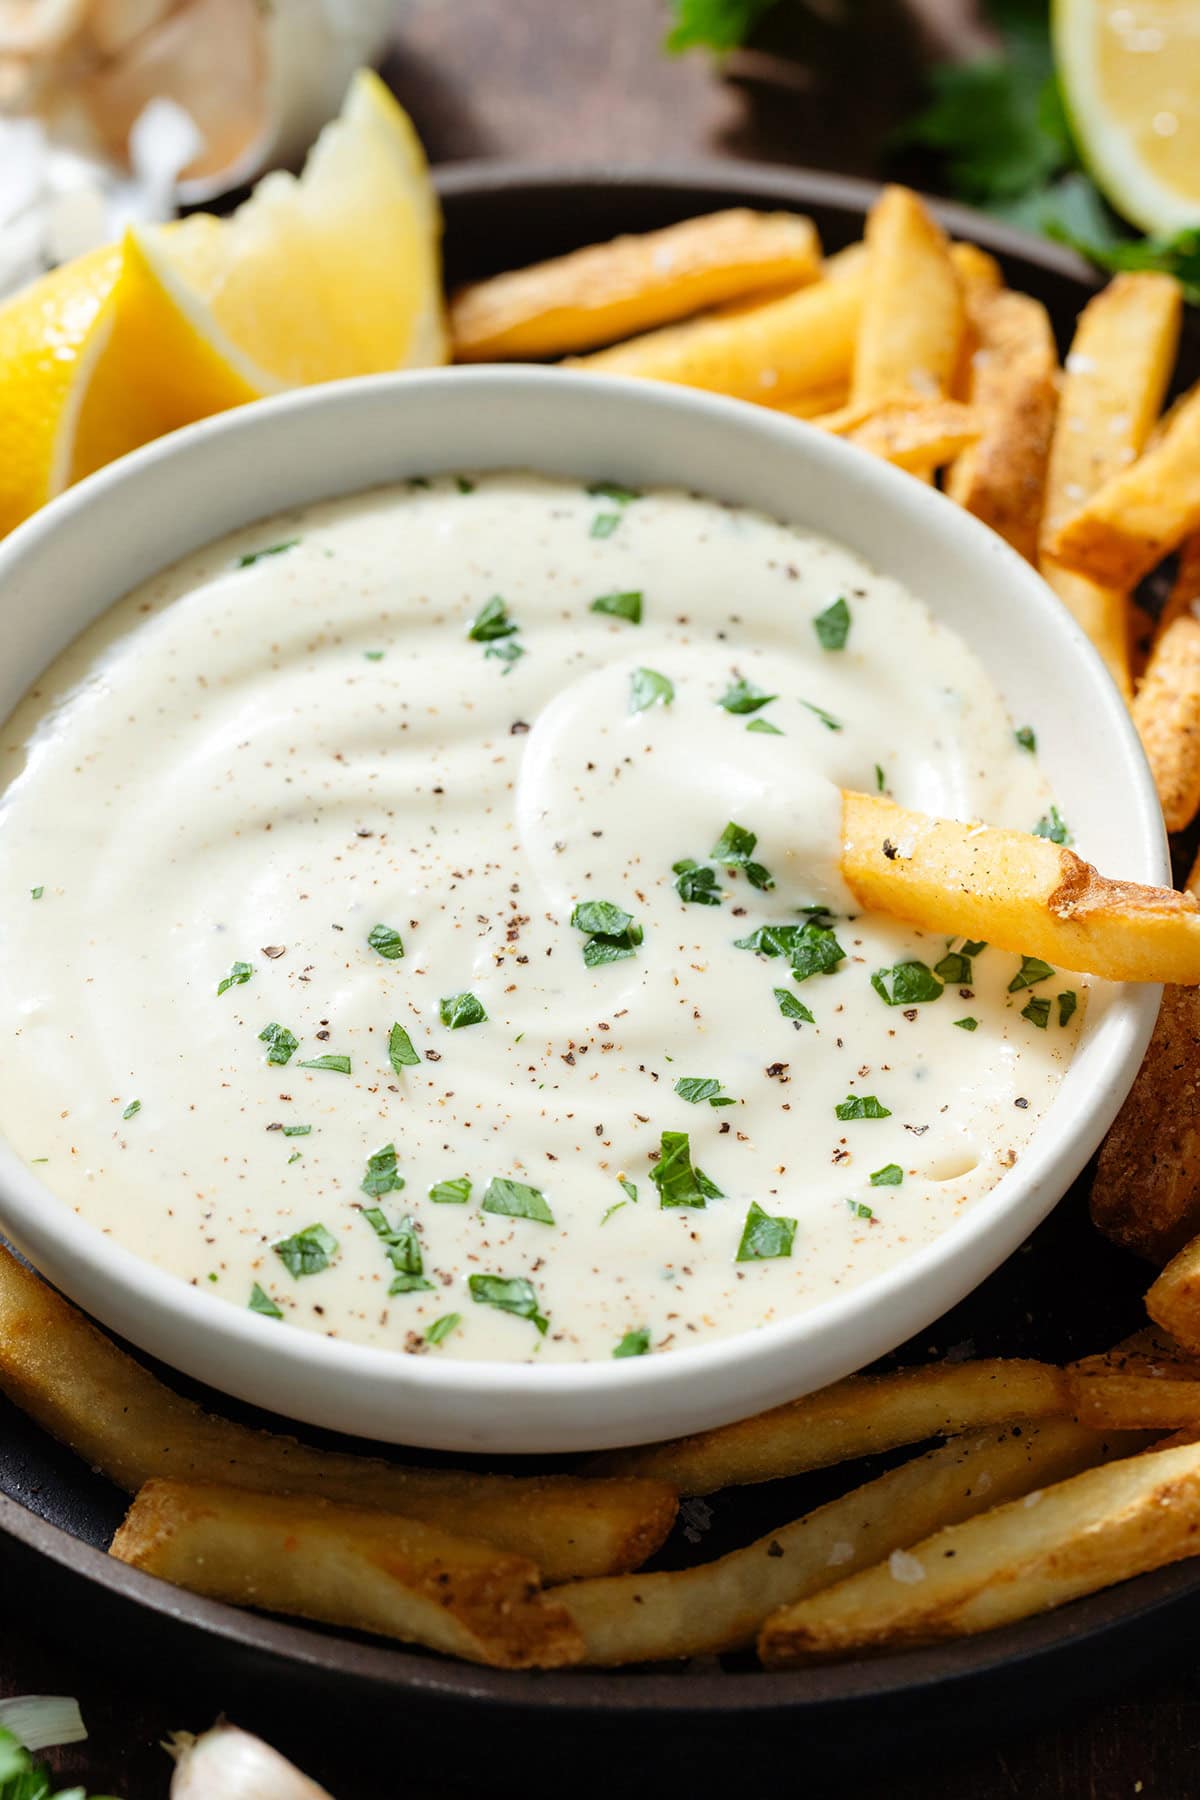
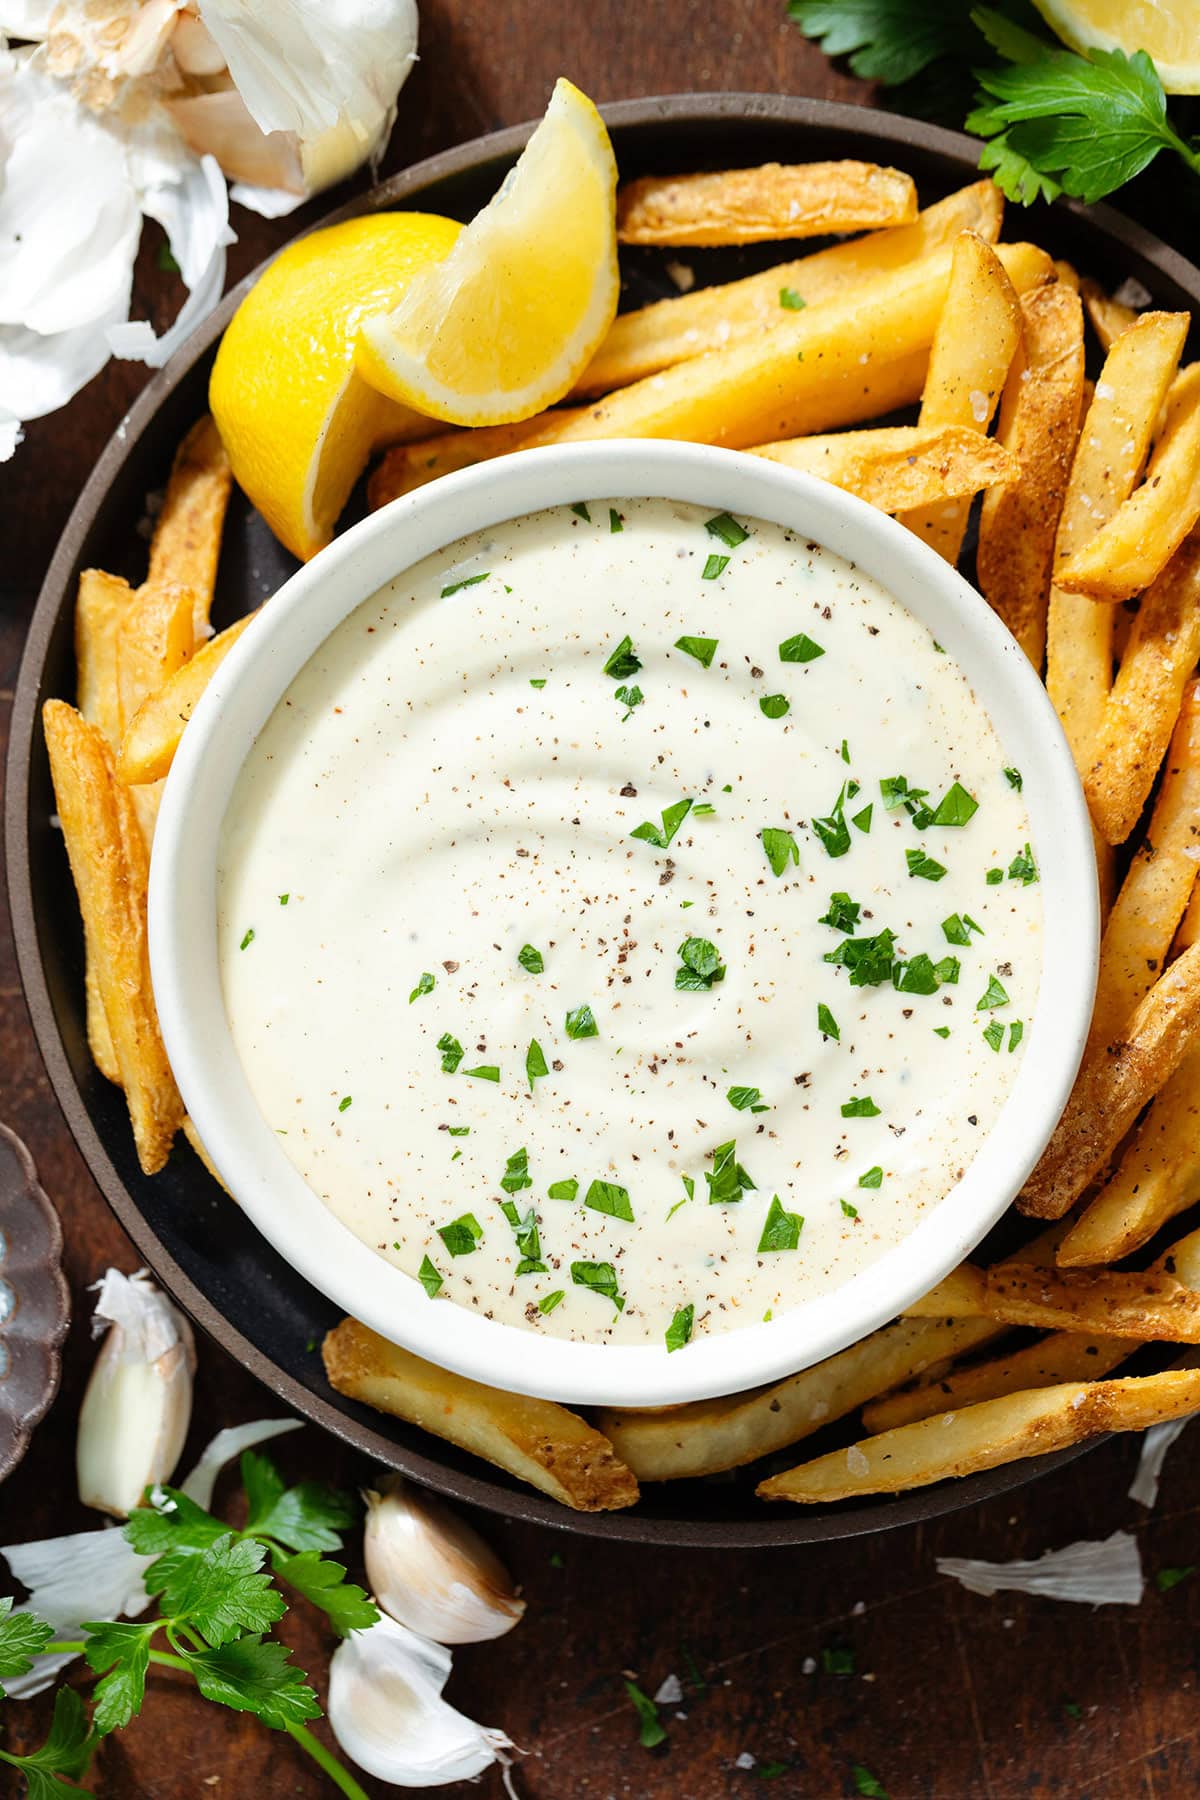
As a dipping sauce - The most common way to serve this aioli is as a dip for fries or roasted potatoes. It's absolutely amazing with these Cajun Fries, but it's also delicious with sweet potato fries or even these Baked Asparagus Fries! But you don't have to stop at fries! Serve this dip as a side for Zucchini Fritters, Smashed Potatoes, or this Smoky Za'atar Roasted Cauliflower.
Sandwiches and burgers - This dip is delicious in sandwiches, wraps, and especially burgers! Drizzle it on the grilled meat patties or all the toppings before you close the burger with the other side of the bun, or spread some of the aioli right on the inside of a toasted or grilled burger bun.
Bowls - You can drizzle the aioli over grain bowls or rice bowls with roasted veggies and protein like roasted or grilled chicken, fish, shrimp, or tofu. I use it the same way I would Spicy Sriracha Mayo or Bang Bang Sauce which also have mayonnaise as their base.
Storing
- Fridge: Store the aioli in an airtight container or a jar in the refrigerator for up to 5-7 days. Always use a clean spoon to avoid bacteria.
- Freezer: Do not freeze the aioli; mayonnaise doesn't freeze well. Once you defrost it, it won't have the same creamy texture.
FAQs
A from-scratch recipe is made with egg yolks, olive oil, lemon juice, mustard, garlic, sea salt, and pepper. A quick version skips the egg yolks and oil and uses mayonnaise instead.
No, you can use the whole garlic! When you roast it, it changes its flavor completely. It has a very mellow, smooth, caramelized flavor. If you're using raw garlic, you only need 1-2 cloves.
I chose to avoid the raw egg yolk in this recipe to make things easier, quicker, and safer for everyone. This recipe uses mayonnaise that contains pasteurised egg yolks so there's no need to add raw ones.
Similar Dipping Sauces
Below are four delicious, easy dips that can be used in a similar way as this roasted garlic aioli. Try them with fries, in sandwiches, burgers, wraps, or rice and grain bowls! To see all the latest ones, head over to Dips, Dressings, and Spreads.
📖 Recipe

Roasted Garlic Aioli
- Prep Time: 15 mins
- Cook Time: 50 mins
- Total Time: 1 hour 5 minutes
- Yield: 1 cup 1x
- Category: Dip
- Method: Oven
- Cuisine: American
- Diet: Vegetarian
Description
This Roasted Garlic Aioli is delicious with fries or roasted potatoes, in burgers, sandwiches, wraps, or drizzled over rice bowls as you would spicy mayo.
Ingredients
- 1 bulb of garlic
- 1 tbsp extra virgin olive oil
- ¾ cup mayonnaise (I use 100% avocado oil mayo)
- 1 tbsp freshly squeezed lemon juice
- 1 tsp Worcestershire sauce
- ½ tsp sea salt
- ¼-½ teaspoon freshly ground black pepper
Instructions
- Preheat your oven to 400F (200C).
- Cut off the top of the garlic to reveal the cloves, careful not to break the bulb apart.
- Wrap the garlic in foil and add to a small baking dish.
- Drizzle the visible garlic cloves with olive oil and close up the foil.
- Roast in the oven for 40-50 minutes.
- Take the garlic out of the oven, open the foil very carefully to avoid getting burned by the hot steam, and let the garlic cool for 10-15 minutes while you prep the rest. Keep in the fridge if you plan to store it for longer. The garlic should be almost completely cool when you mix it with the rest.
- Add mayonnaise, lemon juice, Worcestershire sauce, sea salt, and black pepper to jar with a large opening.
- Use a spoon or a fork to get all the cloves out of the garlic bulb and add them to the rest of the ingredients.
- Use an immersion blender to blend everything together until smooth. You can also do this in a food processor or a blender.
- Add more sea salt, pepper, or Worcestershire sauce if needed.
- Enjoy immediately or store in the fridge for up to a week.
Equipment
Notes
This aioli is best served cold so I recommend making it ahead. Especially if your garlic was still a little warm when you blended it with the rest of the ingredients.
Storing: You can store it in the fridge for up to a week. I don’t recommend freezing it as it wouldn’t freeze well.



Veronika Sykorova says
I've made this aioli a few times since publishing this post and it's always my favorite! The roasted garlic flavor really comes through. If you like the recipe, please leave a comment like this one, it gives me feedback and helps other readers!