

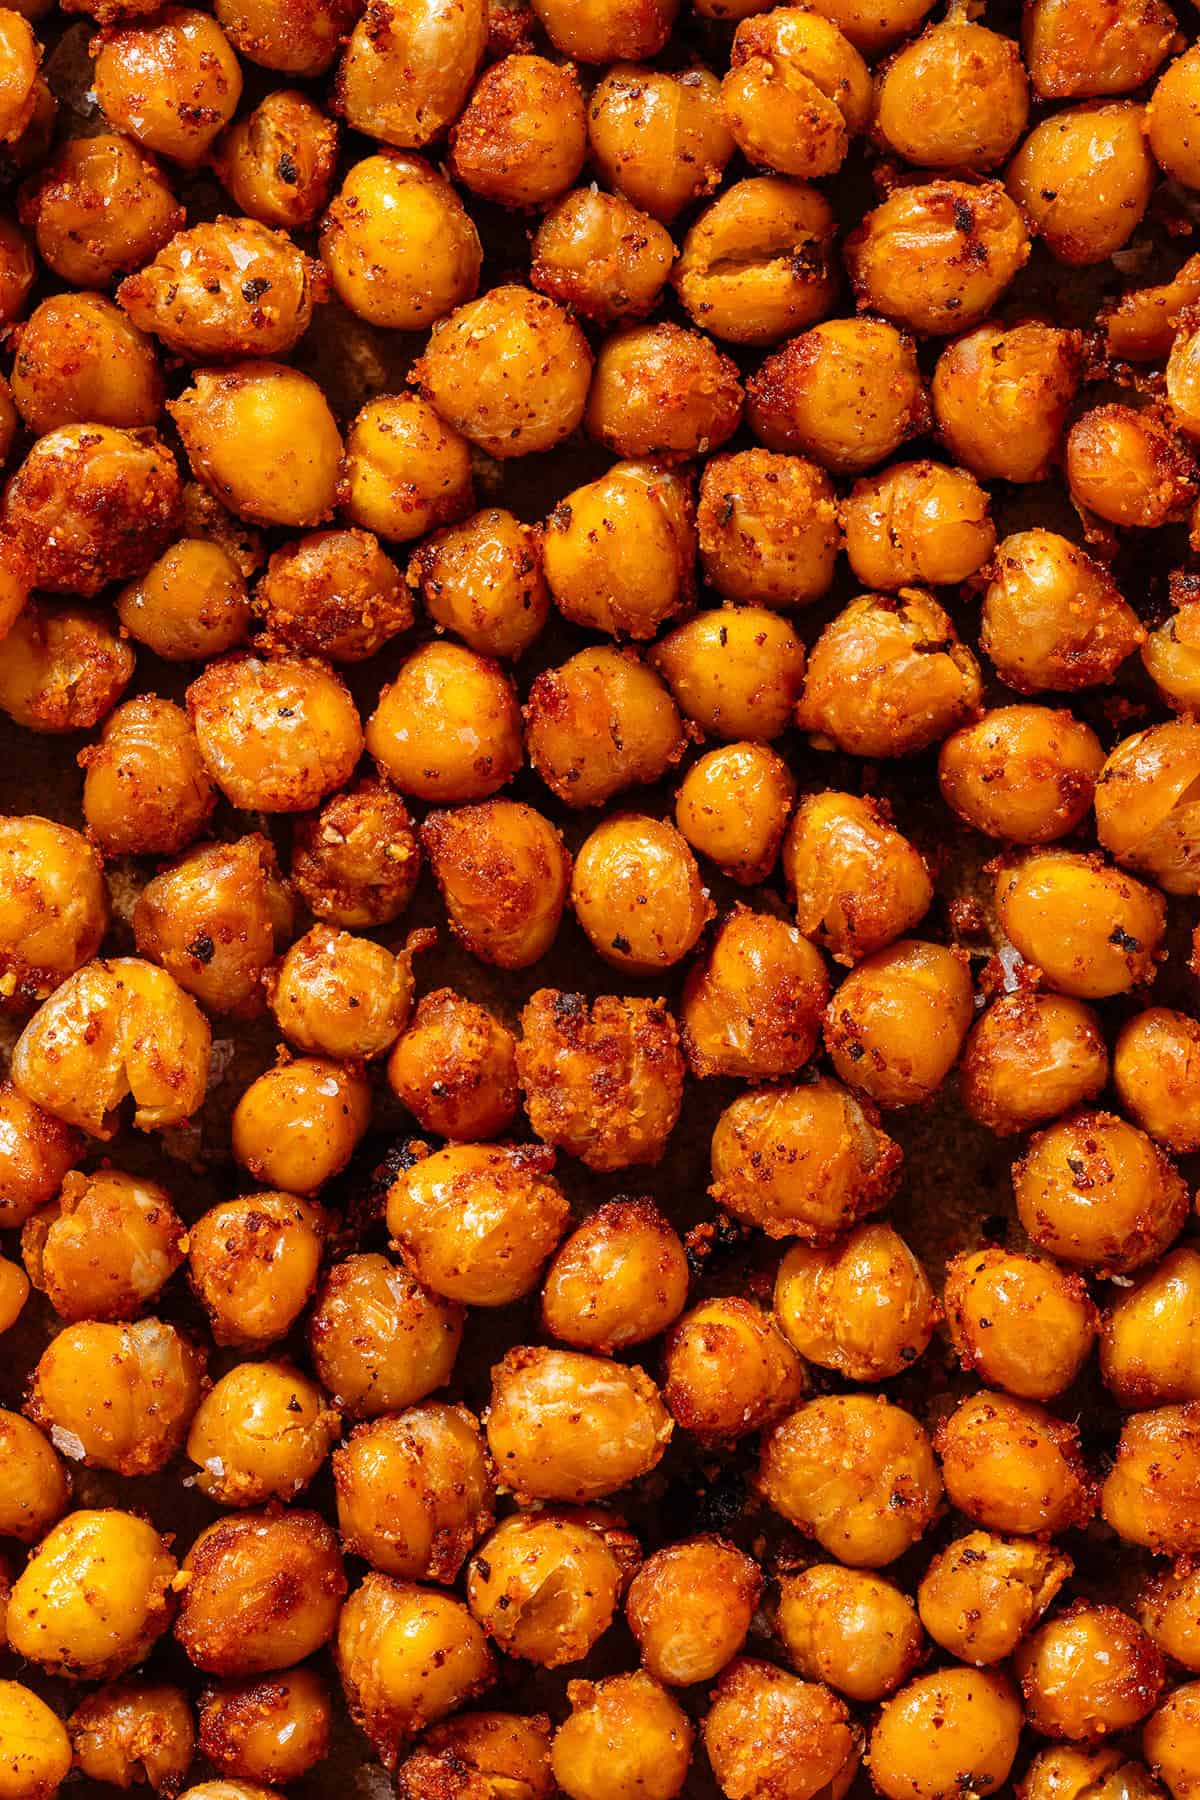
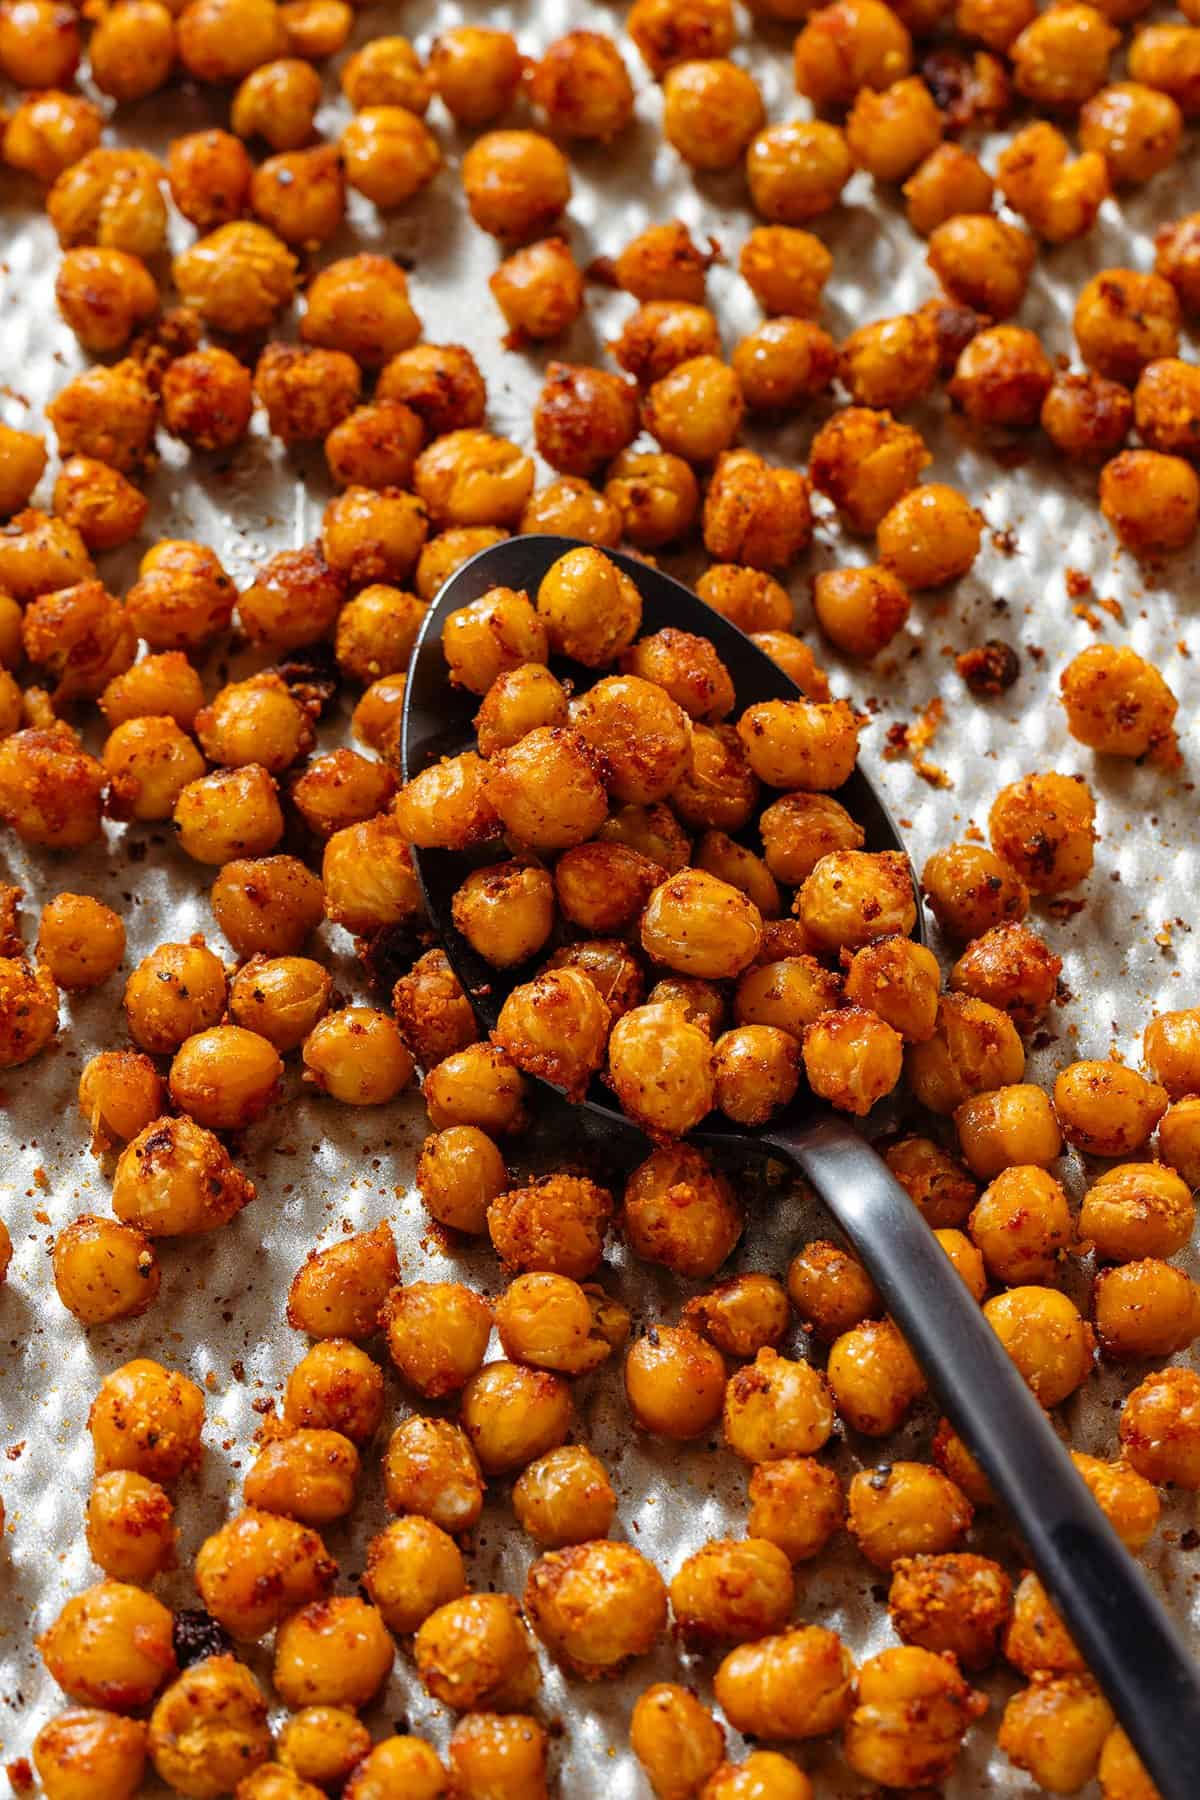
These Garlic Roasted Chickpeas can be ready in less than 30 minutes and have just 5 simple ingredients! They make a delicious savory snack or a great topping for salads and bowls! Add them to salads instead of croutons or take them with you to work or on a roadtrip as a snack.

Jump to:
Why You'll Love These Garlic Roasted Chickpeas
Quick and easy - You can roast these in just 30 minutes with only 5 ingredients and a few simple steps! If you have canned chickpeas, cooking oil, and a few basic spices, you're ready to make these!
More than a snack - These make a delicious savory snack you can take with you on the go, and they make great finger food for game days. But that's not all! I highly recommend adding them to your salads instead of croutons or to your quinoa or rice bowls instead of plain cooked chickpeas or beans! Try them in my Shrimp Caesar Salad or this Arugula Pear Salad.
Ingredients
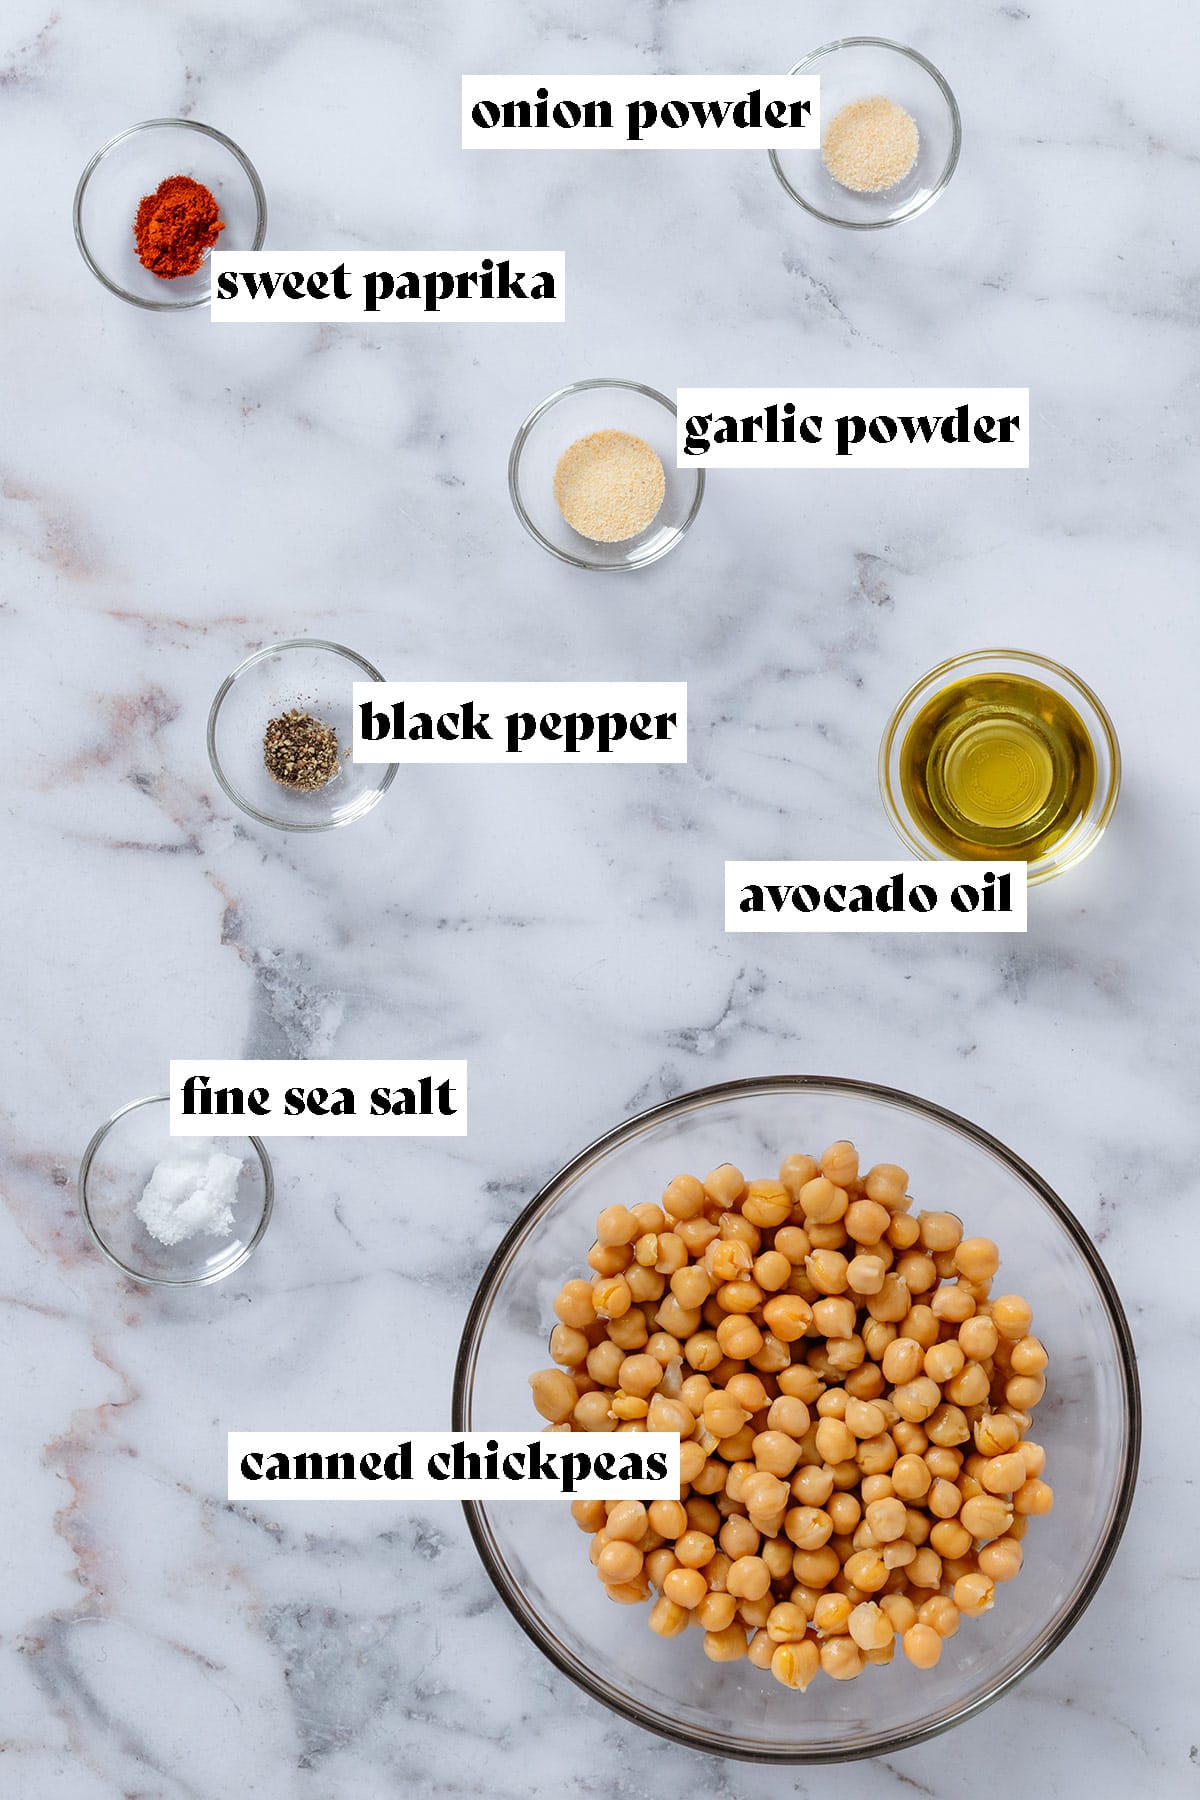
- Canned chickpeas - While you can always cook your own chickpeas, I like to use canned chickpeas to save time. All you need to do is rinse and dry them!
- Avocado oil - I recommend using pure refined avocado oil. It has a neutral flavor and a high smoke point of 500F. I prefer it over olive oil because of the higher smoke point.
- Spices - You'll need garlic powder, onion powder, sweet paprika, and freshly ground black pepper. It's very simple, but they give the chickpeas a ton of flavor! You could always go extra simple with just garlic and salt, but I wanted to make them a little more flavorful.
- Sea salt - I recommend avoiding table salt if you can and using fine sea salt or Himalayan pink salt.
Variations and Substitutions
- Add smokiness - You can dust them with a little bit of smoked paprika. Either instead of the sweet paprika or use both for more flavor!
- Add some heat - Season the chickpeas with some red pepper flakes or a little bit of cayenne pepper for a little bit of a kick. If you want them smokier, you can add some chipotle powder.
Step-by-Step Instructions
- Preheat your oven to 375F and prepare a large baking sheet and paper towels.
- Drain and rinse your canned chickpeas and spread them on the paper towel, and pat them dry with another one.
- Remove the paper towels and line the baking sheet with parchment paper if it isn't nonstick.
- Toss the chickpeas with avocado oil and season with fine sea salt, garlic powder, onion powder, and paprika.
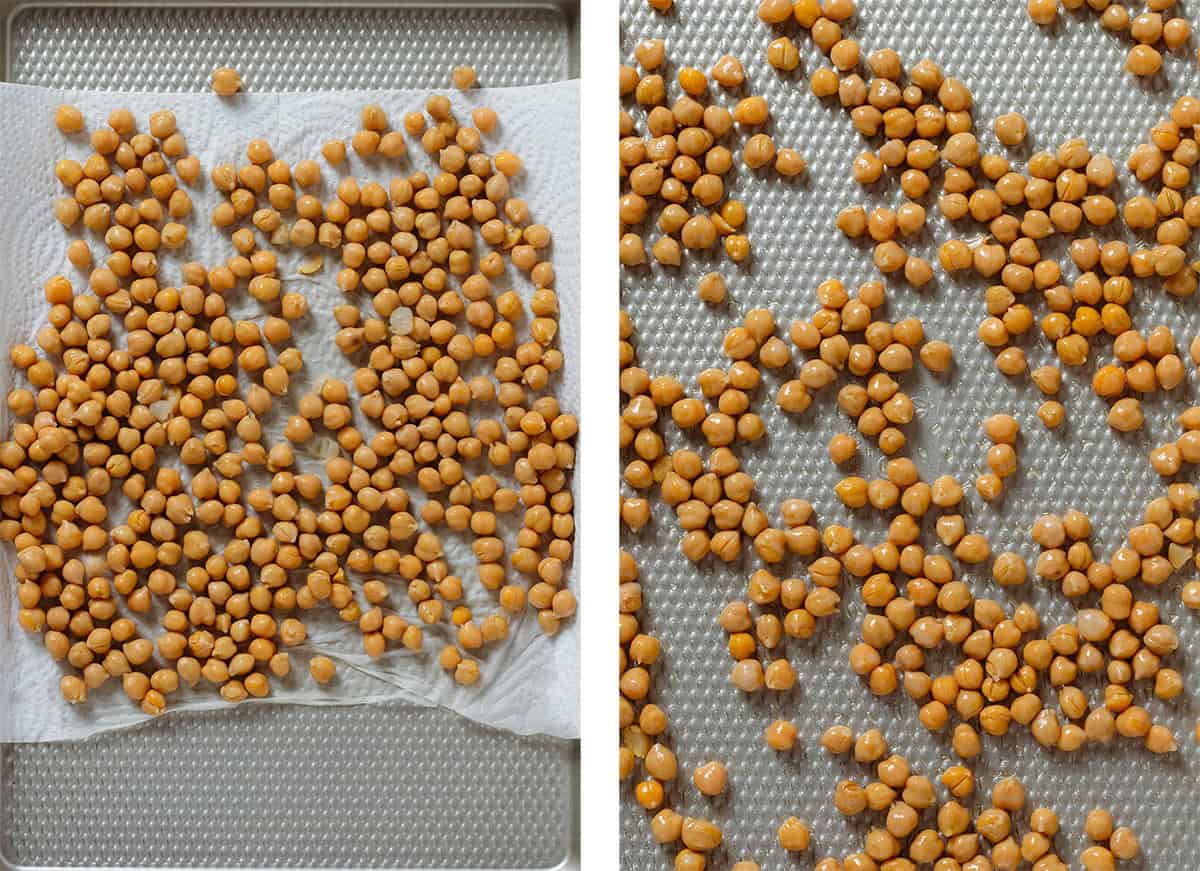
- Toss again until evenly covered and spread them out. The more space they have, the better they’ll roast.
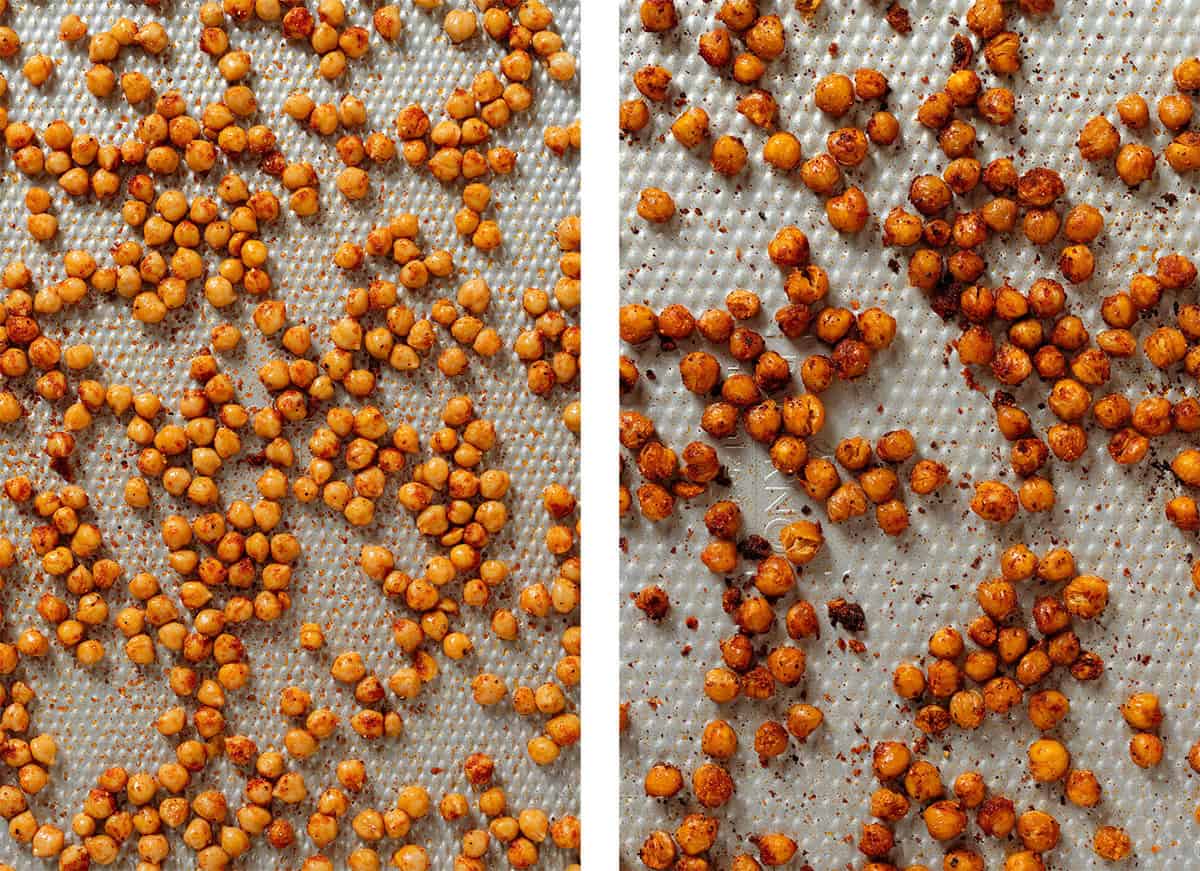
- Roast the chickpeas in the preheated oven for 10 minutes.
- Toss them and roast for another 8-10 minutes. I like them still soft in the middle, but you can roast them for 5 extra minutes if you like them extra crispy.
- Enjoy warm or cool. Allow them to cool completely before storing in an airtight container in the fridge.
Would you like to save this recipe?
Tips & Tricks!
- Make sure the chickpeas are dry before adding all your spices and oil. If they're damp, they won't dry out as much.
- Give them enough space on the baking sheet. The more you spread them out, the crispier they'll get.
- Get creative with the spices! I kept it very simple and garlicky for this recipe, but you can add heat or different spices, or even sugar (use parchment paper if you add sugar) to change things up.
Serving and Storing
Enjoy them fresh: These are best served right off the pan once they cool down slightly. The longer they sit, the less crunchy they become, but they'll still be delicious!
Serving ideas: You can serve them as a savory snack, finger food instead of chips, or add them to salads or bowls instead of croutons. Add them to this Caesar Pasta Salad!
Reheating: You can serve them both warm and cold, but once you store them in the fridge, they lose their crunch and become a little tough. To make them softer again and crispier on the outside, place them on a baking sheet and reheat in a preheated oven at 350F for about 10 mintes.
Storing: Store them in an airtight container in the fridge for up to 3-4 days. I don't recommend freezing them.
FAQs
Make sure they're completely dry before roasting them. If you want them extra crispy, roast them at 300F for 10 minutes before tossing them with the oil and spices. I like them still a little soft inside and easy to chew, so I don't do that.
Yes, if you have dry chickpeas, you'll need to cook them until soft first. If you have canned, there's no need to cook them.

More Chickpea Recipes
I'm working on creating other roasted chickpea flavors, but until I share those, below are four chickpea-focused recipes I know you'll love! You can also check out Snacks if you're looking for similar little bites like these chickpeas!
⭐⭐⭐⭐⭐
Have you tried these Garlic Roasted Chickpeas? Please leave a star rating and let me know how it went in the comments below!
Hungry for more? Grab my free Top 10 Best Appetizers e-book, and don't forget to follow me on Pinterest and Instagram!
Print📖 Recipe

Garlic Roasted Chickpeas
These Garlic Roasted Chickpeas are ready in under 30 minutes and have just 5 simple ingredients! They make a delicious savory snack or a great topping for salads and bowls. Add them to salads instead of croutons or take them with you to work or school!
- Total Time30 minutes
- Yield1 ½ cups (4-8 servings) 1x
- DietVegan
Ingredients
- 1 can chickpeas, drained and rinsed
- ½ tbsp avocado oil or other cooking oil
- ½ tsp fine sea salt
- ½ tsp garlic powder
- ¼ tsp onion powder
- ¼ tsp paprika (sweet or smoked, or both)
Instructions
- Preheat your oven to 375F and prepare a large baking sheet and paper towels.
- Drain and rinse your canned chickpeas and spread them on the paper towel, and pat them dry with another one.
- Remove the paper towels and line the baking sheet with parchment paper if it isn't nonstick.
- Toss the chickpeas with avocado oil and season with fine sea salt, garlic powder, onion powder, and paprika.
- Roast the chickpeas in the preheated oven for 10 minutes.
- Toss them and roast for another 8-10 minutes. I like them still soft in the middle, but you can roast them for 5 extra minutes if you like them extra crispy.
- Enjoy warm or cool. Allow them to cool completely before storing in an airtight container in the fridge.
Notes
Storing: Store the chickpeas in an airtight container in the fridge for up to 3-4 days. They’ll unfortunately lose their crispiness as they cool. You can reheat them in the oven at 300F if you prefer but I like eating them cold.
How to enjoy: Eat them as a snack on their own, add them to salads instead of croutons or to rice or quinoa bowls for added protein and texture.
- Prep Time: 10 mins
- Cook Time: 20 mins
- Category: Snack
- Method: Oven
- Cuisine: American


Veronika Sykorova says
These are perfect for when you want something savory and crunchy to snack on but want to stay away from fried chips!